Pages

Thứ Hai, 29 tháng 11, 2010

Bangalore Kathirikai Kootu (Brinjal kootu)

Ingredients:
250 Grams of Brinjal (Cut into cubes)
1/3 Cup Channa dal /Split chick peas
1 Medium size Onion (Finely chopped)
2 Tbsp Coriander powder
1 Tsp Chilly powder
1/4 Tsp Turmeric powder 
1/2 Inch Cinnamon stick 
2 Cloves
2 Pods Cardamom
Coriander and mint leafs
Lime few drops
3 Tbsp Oil
1 Tbsp Clarified butter
Salt to taste
*****************
 **For masala**
*****************
4 Green Chillies 
1 Tbsp Fresh Coconut
1/4 Tsp Fennel seeds
2 Cloves 
2 Pods Cardamom
1/2 Inch Cinnamon stick
1 Inch Ginger
8-10 Pods Garlic

First Step:Wash the Channa dal twice add a pinch of turmeric powder and 1 1/2 cup water and cook in a pressure cooker for 10 min we want the dal to cook al-dente 
Second Step:
Heat a fry pan 1 tbsp oil fry the cloves, cardamom, cinnamon, ginger, garlic and chillies first for 5 mins then add the fennel and coconut and fry a bit more remove from heat allow to cool add to a coffee blender and grind to a coarse paste with out adding water.
                                                      
Lets Prepare:
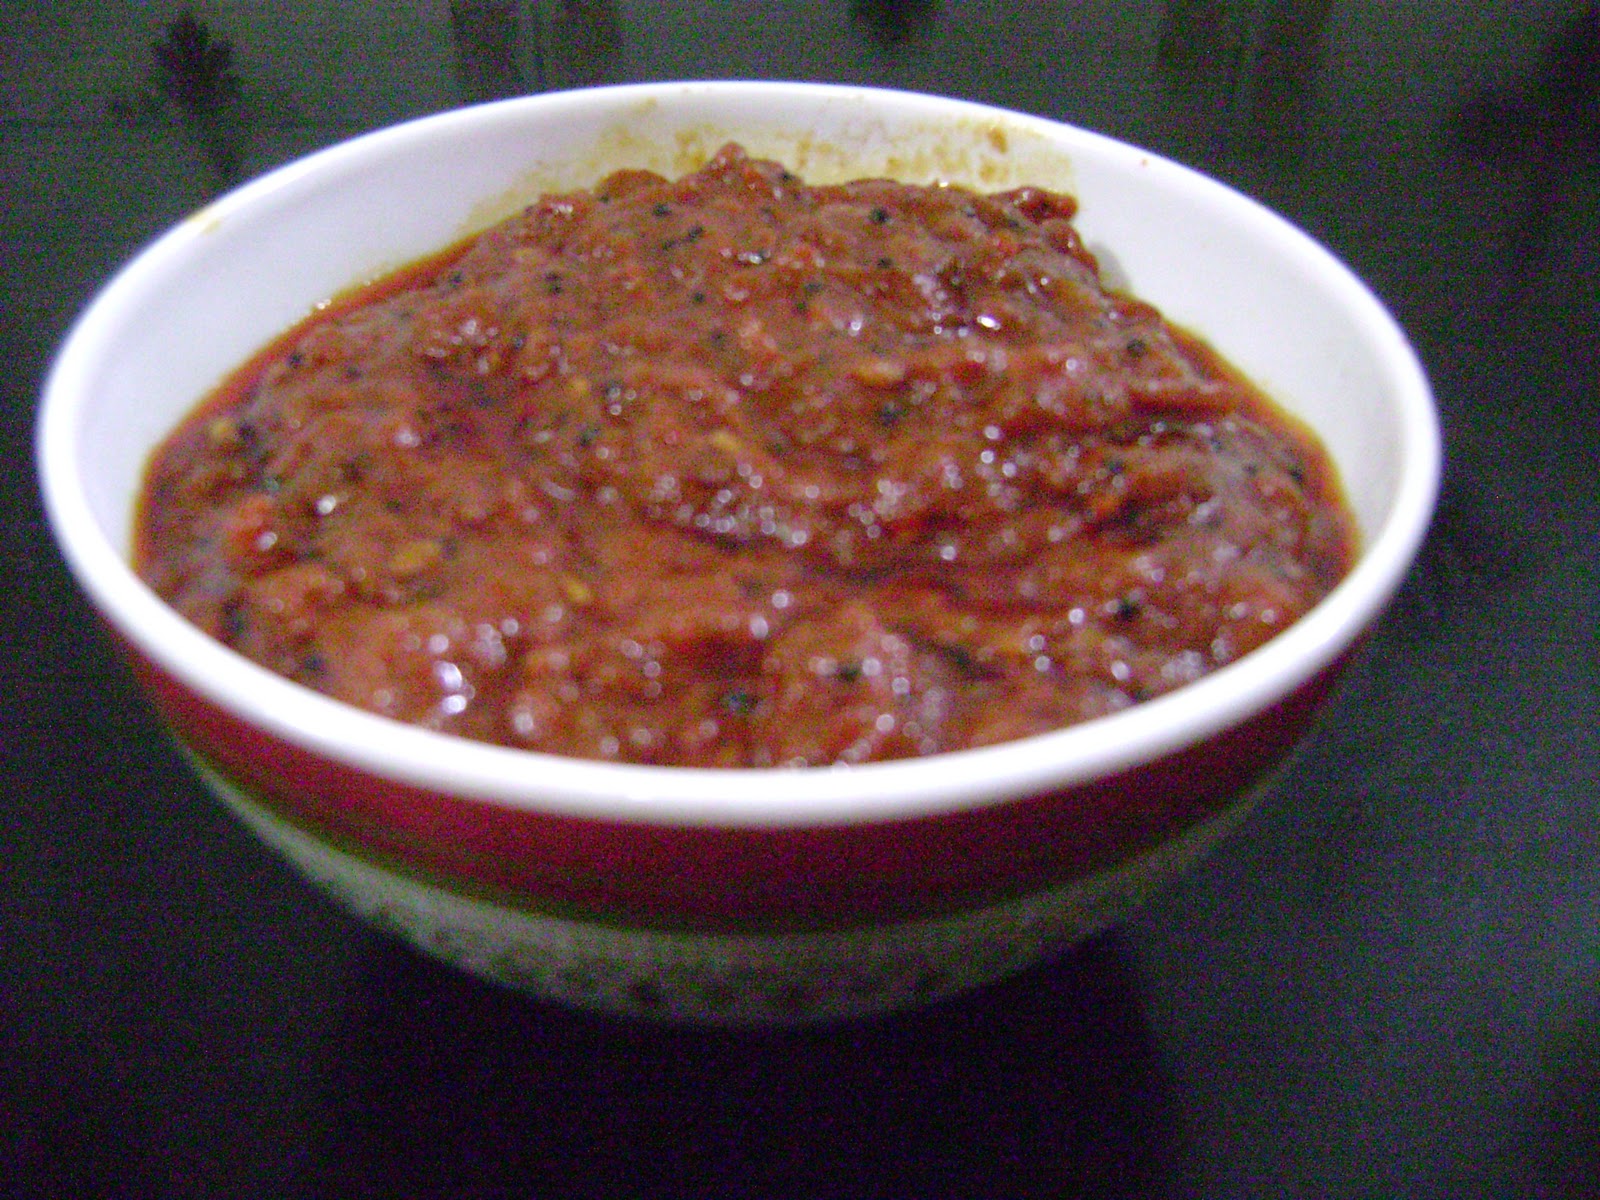
Heat oil and clarified butter in a khadai / wok tip in the cardamom, cinnamon, cloves and onion fry till onion turns to light brown color add the masala paste fry for a min tip in the coriander powder, chilly powder and the turmeric powder and fry till the oil separates from the masala tip in the brinjal and fry for 5 mins on low flame add the cooked dal and 1/2 cup water if needed since the dal already has water we have to look into the water amount and add tp the brinjal add salt stir well cover and allow the brinjal, dal and masala to cook well for 10 mins add lime juice garnish with coriander and mint...serve hot with rice or roti...Enjoy...:)   


Typical Bangalore recipe we enjoy the recipe served along with rice and roti simple recipes which makes me happy. moms cooking always clams me down no matter what few moments in life should be experienced which no money can buy and no doubt mom is my inspiration and will always make me happy with her simple cooking...thank you mom ...love you...:) 

Dalpoori aur Aloo Tamatar ki Sabji / Lentil stuffed fried bread with potato curry


This is a very traditional recipe of lentil stuffed poori from my native Indian state of Bihar. It is typically made during festivals and special occasions. One such special occasion is the arrival of a new daughter in law in the family as that is seen as the arrival of goddess Laxmi (I have seen this tradition in my family at least). This poori is also considered auspicious and mom used to make it on festivals like Anant Chaturdashi, Dusshera and Deepawali. The usual accompaniments of these pooris are raas wali aloo sabji (gravied potato curry), tamatar ki meethi chutney (sweet tomato chutney) and kheer. The dalpoori I learned from mom and the aloo sabji recipe is probably one of the simplest curry recipes.
I made these pooris during Diwali this year when my brother was visiting. Hubby and bro both enjoyed them thoroughly. I got cool compliments including that they felt they were sitting at a local halwai's shop and enjoying these pooris. Made my day.
Read more »

Thứ Bảy, 27 tháng 11, 2010

100% Vegetarian Soya Kabab

Ingredients:
1 Cup Soya chunks
2 Tbsp Each Corn flour (Corn Starch) / Maida (All purpose flour)
1/2 Cup Yogurt 
1 Tbsp Tandoori chicken masala
1 Tbsp Red chilly powder
1/2 Tsp Turmeric powder
1 Tsp Coriander powder
1 Tbsp Ginger & Garlic paste
1 Tbsp Vinegar 
1 Pinch orange food color (optional)
1 Tbsp Coarse salt
Oil for frying 
Salt to taste.

Before :
  1. Heat water in a pot about 6 cups water add vinegar, coarse salt and soya boil for 15 mins till soya chunks has cooked well switch off the flame and allow the soya to sit in the same water for 20 more mins.(Vinegar helps remove odd flavor from soya chunks )
  2. Drain the soya and rinse twice in running water drain. squeeze out the water from soya chunks and reserve in a bowl.
  3. Add ginger and garlic paste to the soya chunks along with yogurt, tandoori masala, chilly powder, turmeric, salt and food color mix all the ingerdients well in the soya cover and allow to marinate in fridge for 1 hour.  
After:
  • Remove soya from fridge bring to room temp add the corn flour and maida mix and mix well (you can also use besan and rice flour if you dont like corn and maida combo)
  • Heat oil in a wok and start frying the soya drain and garnish with coriander and chat masala serve hot with lime wedge...Enjoy...:)


lot of my face book and youtube friends and viewers requested for more veg recipes...
I've also done detail video demo do watch try it your self and post your comments...:)

Thứ Sáu, 26 tháng 11, 2010

Lachha Paratha


I have always always wanted to make the perfect lachha parathas. These are my hubby's favorite and I like 'em too. The buttery, over-the-top flaky, multi layered and the fun looking parathas are just delicious and very hard to resist, you just wanna rip the layers,dunk in a buttery gravy and gobble it up.
I had tried it a few times and the results were well satisfying but I was still looking for that perfect recipe and my quest ended when I saw the delicious and perfect lachha parathas on Priya's blog. They looked so good... she had explaied it so well and as we all know she somehow has this unique ability to make the most intimidating or intriguing recipes sound easy. It tempted me to try it right away. I also love that she didn't add in any eggs in the dough. I tried it the same day within hours she posted and I can't thank her enough it turned out great...we loved it!
Read more »

Thứ Tư, 24 tháng 11, 2010

Gobhi Masala / Caulifower cooked with cashew and spices

"What to make for dinner tonight?" A thought which haunts me immediately after having finished with lunch. Asking hubby usually is returned with "just make anything" or "can we order some takeout" (he is sweet I know)! Hmmm... I usually know I will make rotis but what do I make to go with it. I do try to come up with something new every now and then but being a vegetarian sometimes limits your choices. I face a similar situation when I find myself deciding on what to take for a potluck, or a  get-together which  should be  different and not the same old paneer and regular veg preparations.
Now cauliflower is everyone's favorite but how many times can you make and serve the same aloo gobhi, bhaji or parathas for that matter. So in my quest for making something different yet elegant, simple yet exotic and of course quick 'n easy, I tried to glamorize the cauliflower here a little.. hubby was pleasantly surprised and I was more than pleased with the results and a new find :)
Read more »

Tomato Pickle

Ingredients:
2 Kilo Tomatoes  
6 Tbsp Chilly Powder
1 Tbsp Turmeric Powder 
1 Cup Vegetable Oil
1 Medium Lime Size Tamarind 
3 Tbsp Mustard Seeds
1/2 Tsp Fenugreek Seeds 
1/4 Tsp Asafoetida
2 Tbsp Salt
1/4 Tsp Citric acid (if needed)
1/4 Cup Vinegar (if needed)

Lets Prepare:
  1. Try to use super ripe tomatoes for this recipe blanch & deseed the tomato if possible how ever i was unable to either blanch or deseed. chop into small cubes.
  2. Heat a heavy bottom pot or try and use a nonstick heavy bottom pot tip in the tomato cover and allow the tomato to wilt down a bit for 10 mins try to keep stirring constantly 
  3. In a small pot add 1/2 cup of water bring to a boil and add the tamarind and cook till tamarind goes into a mush for 15 mins remove from flame and allow to cool before extracting pulp. once cooled squeeze the tamarind to extract pulp strain in a tea strainer and reserve. you can also use 2 tbsp of ready to use tamarind pulp which is available in the market.
  4. Heat a fry pan and toast the 1tbsp of mustard seeds try to toast the seeds well on low flame once the mustard seeds stops popping reserve in a plate and allow to cool in the same fry pan add the fenugreek seeds fry well and reserve in the same plate and allow to cool before preparing a powder. in a coffee blender add the toasted seeds and prepare a powder and set aside.
  5. Constantly keep stirring the tomatoes the moisture from the tomato should completely evaporate in 1 hour time now add the tamarind pulp, chilly powder & turmeric powder mix well and allow to cook till everything has gone dry in 1 1/2 hour.
  6. Heat a fry pan add oil and heat well add the 2 tbsp of mustard seeds and 1/4 tsp of asafoetida and fry well tip the hot oil mixture in the tomato mix well and fry the tomato ensure the moisture has completely evaporated from the tomato while frying. add 1tbsp mustard and fenugreek powder mix well and fry for another 10 more mins till the oil surfaces on the top switch off the stove allow the pickle to cool completely before you bottle. serve the super duper pickle with curd rice, lime rice or sambar rice...Enjoy...:) 

Suggestions:
  • While tempering for pickle you can fry garlic and curry leafs and add to the pickle.
  • citric acid and vinegar can be used to preserve the pickle. add vinegar or citric acid once the pickle has cooled completely.
  • Try to blanch peel and deseed the tomato before you prepare this recipe.
  • If you add preservatives try to reduce tamarind pulp and add bit more chilly powder. as both the preservatives are sour the sour taste will increase more in the pickle so reduce tamarind pulp add more chilly as the sour taste will reduce the hot and spicy taste.


I learnt this recipe from mom as she was working she had to make things simple and straight she did not have time to sundry the tomatoes to prepare this pickle as that process consumed a lot of time and we have to wait for summer to enjoy this recipe but mom always had her way of preparing this pickle fast and simple i remember when i was a kid during Saturday or Sunday our house used to smell so good with all the pickles she prepared she never let her mother-in-law down by giving reasons that she was working and did not have time for not preparing traditional recipes. this recipe is so simple and easy for working women in just 2 hours you can prepare this wonderful recipe and enjoy. if you want to sample this recipe then try to prepare with just 1/2 kilo of tomatoes and use 1/4 amount of the given ingredients i'm sure everyone will love it try it your self and post your comments...

Thanks mom for sharing your recipe...:)

I've also done a video demo watch and enjoy...

Thứ Hai, 22 tháng 11, 2010

Gulab Jamun


This sweet dish is another one of those from the Indian kitchen that needs no introduction so I will not write much about it. The soft sweet syrupy balls of goodness are every sweet lovers absolute favorite. These are in fact so popular that if you have ever been to an Indian restaurant even once in your life, chances are you have probably had Gulab Jamuns. In India they are sold by practically every place that carries anything sweet. Every high end or average restaurant, every odd sweet shop around the corner, every festival, every wedding dinner, if you stop by at a friend's place and they serve something sweet, more often than not, it will be these jamuns... you get the idea.
I will accept that they are a little tricky to make. The recipe is strictly to be adhered to and if you do, they come out great. It took me a couple of attempts to get it right but I am glad I tried. Here's my attempt to recreate these Jamuns from a recipe I really liked on Manjula's site.
Read more »

Chủ Nhật, 21 tháng 11, 2010

Cauliflower Pepper Fry

Ingredients:
11/2 Cups Cauliflower florets
1 Large Bell pepper (Cut into cubes)
1 Large Onion (Cut into Cubes)
1 Tbsp Ginger and Garlic paste
1 Sprig Curry leafs
2 Green Chillies Finely Chopped
1/2 Lime Juice
1 Tbsp Pepper Powder
1/2 Tbsp Kitchen king masala or Garam masala
1/4 Tsp Turmeric powder
1/4 Tsp Chilly Powder
1 Tbsp Coriander Powder
1 Pinch Asafoetida
2 Tbsp Vinegar
2 Tbsp oil
1/2 Tsp Clarified Butter
1/2 Cup water
Salt to Taste
Finely chopped fresh coriander and mint leafs for garnish.


Lets Prepare:

  • Using a mortar and pestle crush 5 pods of garlic and 1 inch piece of ginger.

  • Heat at least 5 cups of water in a pot add vinegar and 1/2 tsp of salt clean the cauliflower and add the cauliflower to the water leave for 5 min and then rinse throughly with running water this  way of cleaning will remove any pesticide from the cauliflower...make sure not to cook the cauliflower in this process.    

  • Heat a wok add oil and clarified butter then tip in the ginger and garlic paste tip in the curry leafs fry a bit tip in the onion and the chillies add a pinch of asafoetida fry the onion till transparent tip in the  turmeric,chilly powder and coriander powder and fry everything for a min add the salt and tip in the cauliflower and bell pepper fry everything for 2 more mins add water bring to boil and cover till the veg has cooked and the water evaporates add the kitchen king masala and the pepper powder and sprinkle little water and mix well and fry cover for few more mins and add few drops of the lime juice and  add finely chopped coriander and mint stir and serve hot for rice or roti...Enjoy...:)
In India every one prepares a vegetable for everyday lunch or dinner this is a very common recipe we normally prepare few south indian homes enjoy this recipe for either rasam rice or curd rice either ways this recipe has a class taste well balanced side dish recipe...:) 

I've also done a detail recipe video demo do watch try it your self...enjoy...:)

Thứ Bảy, 20 tháng 11, 2010

Mushroom Galette with caramelized onion, tomato and mozzarella


The cool thing about blogging is that it exposes you to so many different cuisines and styles of cooking. This is one dish that I'd heard so much about but never had a chance to either taste it or make it. With my love for baking this dish always had my fancy. It is a classic French dish which is more like a savory tart, somewhere between a pizza and a pie. After reading up about it and googling several recipes, I was able to come up with a version that fit my taste. With its free-form crust that makes for perfect main course and can also be served as an appetizer at a potluck or large party... it is relatively easy to make,  rustic, delicious, fun, and doesn't need as much expertise as pie and nor does it need lots of eggs to set as a quiche! A bite into a slice hits you with the creaminess and earthiness of the mushroom with a nice bite, followed by the crunchy crust which feels in between a pizza crust and puffed pastry and finishes off with the sweetness of caremelized onions. Not to brag but I was definitely very pleased with the results :)
Read more »

Thứ Năm, 18 tháng 11, 2010

Brownie Tart

This Brownie Tart/Pie has a deep intense and rich chocolate flavor with a nice fudgy texture. One afternoon, after running errands I was sitting with my kiddo on the couch and turned on the TV and Ina Garten was pulling a scrumptious brownie tart out of the oven and it really made my sweet tooth ache. I can’t resist a fudgy gooey brownie and believe me I have enough will power to overlook the dessert section otherwise! But a Brownie in its fancy yet rustic tart avatar as gooey, fudgy and chocolatey and as this one is not to be ignored... I could taste and smell the intense choco flavor even through my TV screen... lol :). Immediately got up from the couch and made it within the hour. I totally love her Barefoot Contessa, everything she makes always looks divine and awesome and she makes it all seem so effortless. It turned out so good as Ina would say, what could be bad about brownies?! 
Read more »

Potato Wafer Omelet

Ingredients:
2 Eggs
1 Cup Potato wafers
1/4 Onion finely chopped
2 Chillies finely chopped 
2 Tbsp Oil
3 Tbsp Milk
Salt to taste.

Lets Prepare:
Crush potato with your hands and add in a bowl add onion and chillies and the milk crack open the eggs in the bowl add salt as per your taste and whisk well. Heat a tava or a skillet and add 2 tbsp oil and pour the omelet mixture to the tava and spread and roast till one side is cooked flip and cook the other side and serve...Hot...Enjoy...:)

Few suggestions you can try:
you can use cheese flavor chips it tastes super.
you can also add coriander leafs and mint leafs while preparing the omelet
you can also add a pinch of red chilly powder or black pepper powder instead of  green chillies 
you can also add 1 tbsp of fresh cream to the omelet mixture
                                
I once saw this recipe on television but the lady who prepared this did not prepare omelet but she added the wafers to the skillet and cracked open the eggs directly on the wafers and prepared a scramble which i tried out my self and totally regretted and then i tried omelet with my own idea using wafers again and it was a hit...and best part about this recipe is you don't have to waste time cooking potato for omelet this tastes exactly the same and its much more tasty do try it your self  enjoy and post your comments..:)

Do watch my potato wafer omelet demo...enjoy...:)


Thứ Ba, 16 tháng 11, 2010

Raj Kachori with Chhole / Puffed fried bread with spicy and tangy chickpea filling


Raj Kachori is a popular street-food in India. Back in my hometown in India there is a small hole-in-the-wall store that makes them the best I've ever had and these kachoris are definitely in the list of a few things that I do make sure to get my fix of whenever I am visiting. They are basically a crispy and flaky puffed fried round flat bread filled with a spicy and tangy chickpea filling and topped with different chutneys. They makes for an awesome and filling street food. I came across this recipe while I was going through one of my cookbooks from Sanjeev Kapoor. It immediately triggered all the memories and I knew I had to make it. The kachoris are a little tricky to make but you should be able to get it right in a couple of attempts.
Read more »

Chủ Nhật, 14 tháng 11, 2010

Chana Dhal Halwa

Ingredients: 
1/2 Cup Chana Dhal / Split Chick peas 
1/2 Cup Sugar (Powdered)
2 1/2 Tbsp Clarified Butter / Ghee
2 Tbsp Oil
2 Pods Cardamom
1 Clove
15 Cashew nuts
10 Almonds
10 -15 Golden Raisins
1 Pinch Yellow Food Color  
Almond Essence Few Drops or saffron strands.
1/4 Cup Water.
First Step: Wash the chana dhal and soak for 2 1/2 hours or till the dhal doubles in size.

Second Step: In a mixer grinder or a coffee grinder add the sugar and powder the sugar set aside.

Third Step: Drain all the water once the dhal has doubled and add to a mixer blender and grind to a paste but not to a fine paste a bit coarse is better the halwa will have nice texture.

Fourth Step: Heat a heavy bottom pan or use a nonstick pan or kadai and add the 2 tbsp oil and clarified butter tip in the chopped almonds, cashew and raisins fry for a bit drain all the fried nuts and reserve. leave the oil and butter in the same pan.

Lets Prepare: In the same oil and clarified butter which we fried the nuts add the prepared dhal paste and stir for 5 min till the moisture evaporates until you get a ball consistency. tip in the powder sugar and stir and incorporate the sugar into the dhal eventually the sugar will melt and add the crushed cardamom pods and the clove mix well add 1/4 cup of water and keep stirring the mixture for 10 mins by now your dhal sugar and the spice will have incorporated well keep on stirring and keep add the rest of the oil and butter mixture to the halwa by 15 mins the halwa will start having nice texture adjust the flame from medium to slow now and then and keep on stirring add the food color and almond essence and stir well the more your stir the better halwa in 20 mins time you should see the entire moisture evaporated and the stickiness almost gone your almost there  keep stirring for another 10 more mins by now the halwa would have evaporated complete moisture and have a nice gloss mix the fried nuts in and serve hot...Enjoy...:)
This was a viewer request from youtube I must thank them i got to learn this recipe from mom and as a kid when mom used to prepare dhal halwa for me i used to enjoy but i never knew it required so much of patience and dedication you need to have strong hands and time to prepare this recipe we cant sit even for a minute but all worth the effort i would want all my viewers to try this recipe out and let me and mom know how did it turn out. i did not have almond essence or saffron strands at home if you have either one at home then use for this recipe.

 I've done detail demo on youtube do watch enjoy and try it your self...:)


Thứ Sáu, 12 tháng 11, 2010

Virgin Piña Colada


This drink probably needs little introduction. It is one of the most popular drinks and rightly so as just the thought of it takes you in a flash to an exotic location. Think beach-side hut sitting on a wooden bench and sipping this drink out of a coconut and yes of-course with a little umbrella for the kicks. The cool thing is though this drink is so versatile, you can have it any time of the year come rain or shine.
When I decided to make it, I got a little curious and read up about it on Wikipedia. That is when I got a true sense of its popularity. Piña Colada is the official drink of puerto rico since 1978. The official record of its introduction is dated 1954 but apparently several others claim for the credit of its invention.
Simple ingredients, easy to whip up and a taste that is out of this world combined with the fact that it tastes great in its virgin form as well makes it perfect for that friday night party over a card game, or even for a large party.
Read more »

Thứ Năm, 11 tháng 11, 2010

Chicken Irani

Ingredients:
  • 1 Kilo Chicken
  • 1 Large Onion
  • 1 Large Tomato
  • 1 Tbsp Ginger & Garlic Paste
  • 1 Tbsp Chilly powder
  • 1 Tbsp Coriander powder
  • 1/2 Tsp Garam Masala
  • 1/4 Tsp Turmeric powder
  • 2 Cardamom Pods
  • 3 Cloves 
  • 1 Inch Cinnamon 
  • 1/2 Bayleaf
  • 3 Tbsp Vinegar 
  • 10 to 15 Almonds
  • 1/2 Lime
  • 1 1/2 to 2 cups water
  • 2 Tbsp Oil
  • 2 Tbsp Ghee / Clarified butter
  • Salt to taste
Lets Prepare: 
  1. Soak almonds in lukewarm water for 1/2 hour and peel the skin using a coffee blender puree the almonds add lukewarm water if needed to get prefect paste consistency.
  2. Boil the onion in little water and prepare a paste using a coffee blender don't use water while preparing a paste.
  3. Blanch the tomato and prepare a puree.
  4. Wash the chicken in water and vinegar.
  5. Heat oil and clarified butter in a heavy bottom pan and tip in the bay-leaf, cloves, cardamom & cinnamon fry a bit tip in the onion paste fry till color changes to a light pink add the ginger garlic paste fry well once you see the oil to the sides tip in the dry masala chilly powder, turmeric, coriander and garam masala fry for a minute tip in the tomato puree fry well till you see oil to the side of the masala add the chicken to masala fry a bit add salt allow the chicken to infuse the masala cover and allow to fry for at least 5 to 10 minutes in the masala add 1 1/2 to 2 cups of water and cover and allow the chicken to cook keep stirring and checking till the chicken cooks and its well done add the almond paste and allow to boil for 2 minutes add lime juice and serve hot with roti or ghee rice or puri...enjoy...:) 


I've done a detail recipe demo on youtube watch and try it yourself...:)


Thứ Tư, 10 tháng 11, 2010

Thai Red Curry


To quote: Chat Mingkwan, in Buddha’s Table: Thai Feasting Vegetarian Style-
“This dish is the most often cooked curry in the Thai household. If a home chef can’t decide which curry to prepare that would please all family members, he or she will end up making red curry. Its paste can be easily made with staple ingredients in the Thai pantry, such as dried chilies, garlic, shallots, and dried herbs and spices. The paste also pairs well with nearly all ingredients, especially any vegetables that grow near the house or those that have been left in the refrigerator.”
Thai is definitely my favorite after Italian (and of course Indian) cuisine. I still remember the first time I gave Thai cuisine a thought was when I was watching Priyanka Chopra's interview after she was was crowned Miss World and the whole Indian media went crazy after her... all TV channels were filled with her biography, interviews, childhood pictures, repeat telecasts of her crowning moment (which was actually 10,000 times lol) and then during one such interview someone asked her about her favorite food and she answered "Thai". I only tasted it after coming to the US and I am totally with Priyanka, at least on her  choice of food... love it! Among the different Thai dishes, the vegetable red curry definitely tops the charts. The unique burst of flavors and the gorgeous color is so appealing that I order it over and over again whenever I am at any thai restaurant.
There was this Thai restaurant about a couple of miles from my place. They were famous for this curry. You would pick your own veggies from a buffet line and the chefs would make it right in front of you in large woks over ceiling high flames. As my luck would have it, they went out of business :( We were craving this curry for sometime now... my hubby challenged me if I could make my own version... I of course accepted it. With a little assistance from my friend and guide *google* and my own memory of the taste of that curry, I tried making it with whatever ingredients I had that time and made it the same night for dinner. Hubby dear was bowled over. We enjoyed it with some Thai sticky rice and had Thai sticky rice with mango for dessert!!  Now, I can  proudly add the world famous Thai red curry to my resume :) Thai cooking is fast, super easy and absolutely heavenly... if you have the paste ready. As I said before, in this version, I used the ingredients that were handy so I have substituted some of the classic thai ingredients (see notes for details).
So, here it is, my version of the classic-
Read more »

Aloo Puri

Ingredients:
1 Medium size Potato (parboiled) 
1 Cup All purpose flour / Maida
1/4 Tsp Chilly Flakes
1/4 Tsp Salt 
Oil for frying
2-3 Tsp of water

Lets Prepare:
  1. Using a cheese grater grate the potato.
  2. Add the chilly flakes, salt and all purpose flour to the grated potato.
  3. Kneed the dough without adding water add very little water if needed while keeding.
  4. Kneed the dough for 5-10 mins add 1/2 tsp of oil and kneed for another 2 more mins and cover allow the dough to rest for 1/2 hour.
  5. Heat oil in a wok to fry puri on medium flame.
  6. Make a fairly large roundle out of the prepared dough and dip in some flour before rolling out. roll out the dough to a large roti using a container lid or a small rounded cake pan cut out equal rounds out of the dough.
  7. Slowly slide the rounds in the hot oil fry press the puri in oil to puff a bit and turn every sec once the color turns to light gold and the puri has cooked drain and serve hot with any gravy or dal...Enjoy..:)
You can also prepare roti out of the same dough if you dont like to prepare puri.
I've also done a detail video demo do watch and enjoy...:)


Event Announcement - Virtual Party - Beverages

A big hello to all you food lovers out there. As you know the Virtual Party has started. Shabitha announced the start of this party back in September (hey its virtual, it can go on for a little longer than a regular party, right :) A few days ago she asked me if I would want to co-host the party with her. Too good an offer to pass on, what made it irresistible was that I get to choose my course.
Well since the party has started with a bang with Shabitha's Chocolates and Ruchika's Snacks, I figured the guests would need something to wash it down with, you guessed it, a nice refreshing drink. So foodies, put your bartender hats on and get your coolers and ice boxes out (or even a thermos if you'd like a hot drink)... lets see what you have in store to quench the thirsts of the guests of this one helluva fun party.


As with everything there's some rules here too (no you don't have to be home before 10 :)
Here they are -

  • Prepare a beverage that meets the party theme... yes you can put an umbrella in it... and send your entries between November 10th - December 10th
  • Multiple entries are allowed
  • Link back to this event announcement page and Shabitha's original event announcement and include the event logo in your post
  • Archived posts are allowed if they are reposted with a link to the event
  • Email the details of the post to aaipey@gmail.com with the subject line as Virtual Party - Beverages with the below details
    •  Your Name
    •  Blog Name
    •  Recipe Name
    •  Recipe URL
    •  Picture of the dish
  • Non bloggers may also send in their entries to the above mail address

Hoping to see  some enthusiastic participation and a lot of entries!

    Thứ Hai, 8 tháng 11, 2010

    Litti and a Century!

    After what seems to be time that went by in a flash, here I am with my 100th post. Co-incidentally today happens to be exactly four months from when I posted my first recipe. Through the thrill of receiving the first comment, the sense of achievement of getting a complex traditional recipe right, the joy of making great new friends, the sense of humility when someone tried out a recipe and it turned out great, learning great new recipes from all my awesome fellow bloggers, the occasional anonymous visitor that likes a dish and makes your day, it has been out and out an joy-ride.
    Hubby deserves a special mention. He is the one who keeps the show going between tasting my dishes, taking awesome pictures and being my 24 x 7 technical support :) Thanking him would actually diminish the value that he adds to my efforts.
    Now to the dish itself. When you think Bihari cuisine, Litti is arguably the first dish that comes to mind. Having its roots deep in Bihari culture, the humble litti has come to gain global popularity. It is basically a crispy roasted dough ball stuffed with a spicy tangy filling made of Sattu. Sattu is a flour made of roasted grams or chana. Mainly popular in Bihar and UP regions of India. It is often considered as a very low budget and nutritious meal full of fiber and protein. It is a favorite and staple at almost all bihari homes. Litti traditionally served dipped in ghee with a side of either aloo/baigna chokha or tomato chutney.
    One memory which is strongly attached to this dish is whenever we used to go to our grandparents' place. Imagine littis and chokha made of potatoes and eggplant fresh from your farm, all roasted in your backyard on a cool winter evening over an open coal fire. Can you smell it yet!  What made it more fun was making the event like a picnic with all my cousins and having a ball of a time. Our Daadi whom I fondly used to call 'Maa' would be the ring leader driving us all.
    Time has since flown, I miss grandma now but even today when I sit in my patio on a cold rainy evening, I still sometimes can smell the aroma of those littis roasting on that open coal fire...
    Read more »

    Vegetable Chicken Fried Rice

    Ingredients:
    • 250 Grams Boneless Chicken ( Cut into small pieces)
    • 1/3 Cup Carrots , Fresh Beans and Bell peppers (Finely Chopped)
    • 1 Large Onion (Finely Chopped)
    • 1 Cup Spring Onion (Finely Chopped)
    • 3 Green Chilles (Finely Chopped) 
    • 1/3 Cup Fresh Peas
    • 2 Cups Basmati rice
    • 3 Cups Water to cook the rice
    • 2 Tbsp Ginger & Garlic paste
    • 1/4 Tsp Clove & Cinnamon powder
    • 1/4 Tsp Chilly Flakes
    • 11/2 Tbsp Black Pepper Powder
    • 1/4 Tsp Aji-no-moto (Taste Maker)
    • 1 Tbsp Soya Sauce
    • 4 Tbsp Oil
    • Salt to taste


     1st Step:

    • Cook the rice in a pressure cooker or in a electric cooker.
    • Once the rice has cooked allow the rice to cool completely down.
    • you can prepare the rice day before and refrigerate.
    • left over rice also can be used for this recipe.

    2nd Step: 

    • Heat a wok or a pan add 1 tbsp oil and add the cut boneless chicken add black pepper powder , 1 tbsp ginger & garlic paste and 1/4 tsp salt fry and cover till the chicken cooks completely in its own juices. (Add water if only needed)
    •  keep stiring and frying the chicken on low flame till the chicken goes dry out of  moisture.

    3rd Step:

    • Heat a wok add 3 tbsp oil and add 1 tbsp of ginger & garlic paste fry a bit tip in the finely chopped onion and chilles fry tip in the vegetables carrots, beans and peas add 1/4 tsp salt fry a bit add 1/4 cup water cover and cook.
    • Once the the veg has cooked tip in the bell pepper and spring onion and fry  a bit.
    • Add the cooked chicken to the veg add the Cinnamon and clove powder, chilly flakes, soya sauce and ajinomoto stir check for salt add if needed cover till the bell pepper and spring onions have cooked and allow the chicken and vegetables to incorporate all the flavors properly allow to fry for 5 mins.

    Lets assemble: 
    • Once the Vegetables are cooked and done add the cooked rice mix well.
    • You can also add lime juice.
    • Allow the rice to incorporate all the flavors and also allow the rice to heat well before serving.
    • Serve hot....Enjoy...:)
       

                                      I've also done a detail recipe video do watch and enjoy...:)


    Thứ Năm, 4 tháng 11, 2010

    Happy Deepawali


    Wishing you all a very happy and prosperous Deepawali. May the festival of lights bring eternal joy and peace to your life.


    Thứ Ba, 2 tháng 11, 2010

    Rumble Tumble

    Ingredients:
    • 6 Eggs
    • 2 Carrots (finely chopped)
    • 2 Indian Turnip / Noolkol (finely chopped)
    • 1 Large Onion (finely chopped) 
    • 150 Grams Cabbage (finely chopped)
    • 2 Green Chillies (finely chopped)
    • 1 Tbsp Ginger & Garlic paste
    • 1/4 Tsp Fennel seeds
    • 1/4 Tsp Pepper powder
    • Coriander finely chopped
    • 1/2 Cup water
    • 3 Tbsp Oil
    • Salt to taste.


    Lets Prepare:

    • Add the fennel seeds, ginger and garlic to a coffee blender and prepare a paste.
    • Heat a wok add oil and tip in the ginger and garlic paste fry a bit add the onion and fry for 2 mins till the onion goes to a transparent color tip in the carrots and turnip and fry allow the moisture to evaporate from the veg add salt and water stir and cover allow the veg to cook till its well done.
    • Add the chillies and cabbage and fry till the cabbage has cooked add pepper powder and salt if needed add a bit of coriander and mix all the ingredients well.
    • Crack open the eggs in a bowl and add the eggs to the veg masala and with gentle hands start to scramble the eggs stir at a slow pace and get the veg incorporated well in the egg scramble. once you see the oil to the sides on the wok the egg scramble is done .
    • Garnish with coriander and serve hot for rice or roti ...Enjoy...:)  
     I've done a detail video demo on youtube watch and Enjoy...:)


    Thứ Hai, 1 tháng 11, 2010

    Shakarpala and Chivda - Diwali Treats


    Us Indians know our festivals. Just to give you an idea, if you were to just add the major national and regional festivals, you will atleast have a list of a dozen. Festivals are always celebrated with much zeal, pomp and show in India. Among these, the arguably biggest festival is Diwali or Deepawali or the Festival of light. Biggest or not, it is definitely my favorite. People clean their homes, decorate entire houses with flowers, rangolis, electric lights and the more traditional diyas (earthen lamps). On diwali night kids and adults alike light firecrackers. You basically keep at it into the night till mom yells out of the window demanding you to return. Yes of course and how can you forget the food! During Diwali you can smell, shakarpala, namkeen, ladoo, mathri, nankhatai etc from every kitchen when you walk around the block. All these goodies also make for a wonderful homemade gift. I remember when I was a little girl, mom making loads of these and then packing individually in gift boxes and she would arrange them in a basket and give to me distribute in the neighborhood. I dressed in my brand new diwali dress would go door to door to deliver this goodies and always come home with basket full of goodies as return gifts. I used to love it :)
    Even though these dishes are traditionally made during diwali, these home-made snacks can infact be made anytime as they come handy when unexpected guests drop in. Out of the several dishes as I mentioned, I picked Shakkarpala and Chivda as they are my favorites.
    Chivda is a combination of toasted flattened rice, roasted peanuts, cashews, dalia and any of your favourite ingredients. Make this crispy, crunchy snack ahead of time and store in an air-tight container. It's perfect for times when you have an attack of the munchies. A warning: this stuff is addictive!
    Shakarpala is deep fried flaky and crispy dough cubes that are coated with sugar syrup almost like a doughnut glaze. Not to mention it is my papa's most favorite snack ever.
    Read more »